Understanding the operation screen
The operation screen is the screen through which you will mostly interact with the Planting Assistant. It displays essential information in real time and provides access to system settings.
This article outlines the main screen icons, and functions available, helping you understand what each element means and how to use the interface efficiently.
You will start by learning about the upper bar.
Upper bar
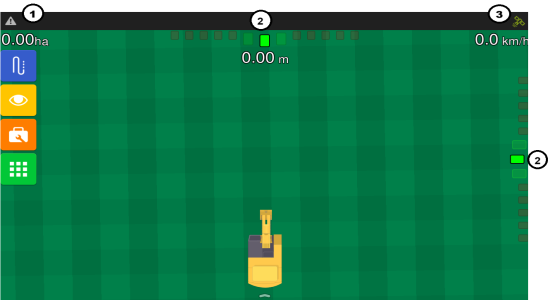
In the upper bar, you will find alerts, connectivity information, and a lightbar.
-
Alerts: Are displayed automatically on the screen during the operation. Slide the notification bar downwards to visualize the list of notifications and to preview the messages. Slide the bar upwards to close it again.
-
Lightbar: Positioned at the top and right-hand side of the operation screen, the lightbar indicates the excavator's deviation from the target in progress. The side lightbar represents the longitudinal distance to the target, while the top lightbar denotes the lateral distance. The illuminated squares correspond to LEDs that activate upon reaching the configured offset, visually signaling the deviation direction (right or left). The operator can adjust the sensitivity, in meters, for the five central position LEDs.
-
Connectivity information: For further GNSS information, click on the icon located in the upper right corner. Only the options according to the configurations of each display and according to the contracted products will be visible.
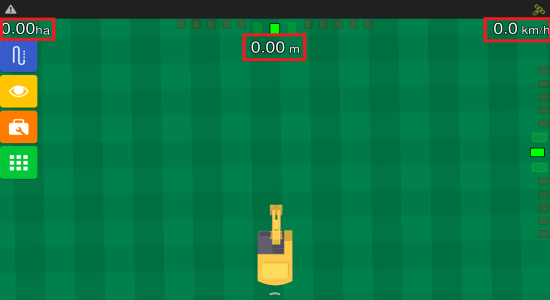
Information configuration
Up to three pieces of information may be displayed on the operation screen. To modify or enter the presented information, proceed as follows:
1. Click and hold for two seconds on the information you want to change.
2. A new window will be presented with the possible options, as shown below:
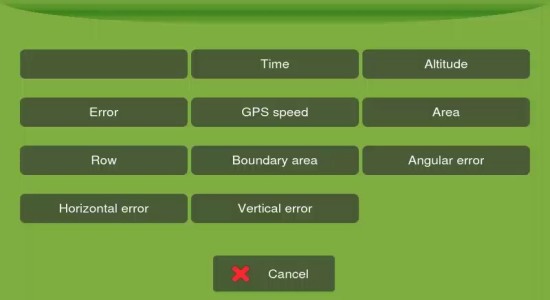
3. Select the information you want to display.
4. The window closes, and the selected information is presented.
Main menu
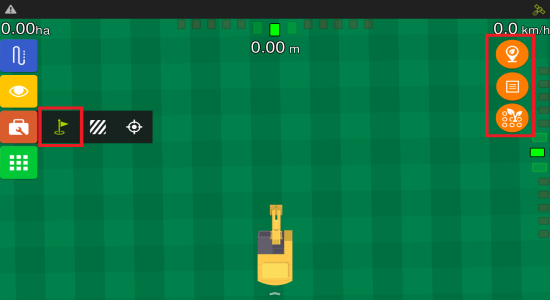
When dragging your finger from the left corner of the screen to the center, a tab will be displayed with the main menu buttons.

The menu on the left contains four buttons:
-
Guide
-
Visualization
-
Tools
-
Configuration menu
Once you select the Tools option, a menu will be displayed with three options, as shown below:

By selecting the Markers button, a menu will pop up on the right-hand side.
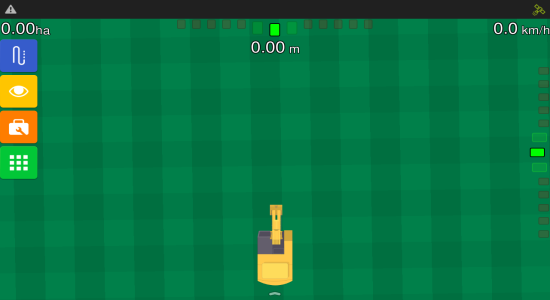
Now that you're familiar with all the buttons on the operation screen, you’re ready to begin the operation.
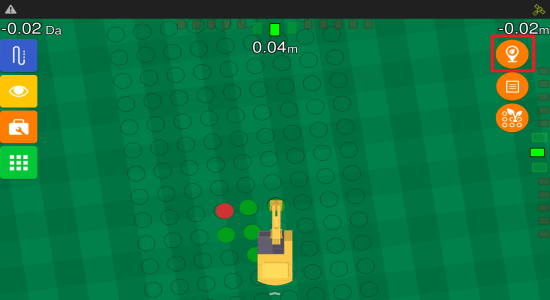
As soon as the operation starts, the screen will look similar to the one shown below. Green dots represent seedlings planted within the tolerance defined in Position tolerance, while red ones indicate those that are outside this limit.
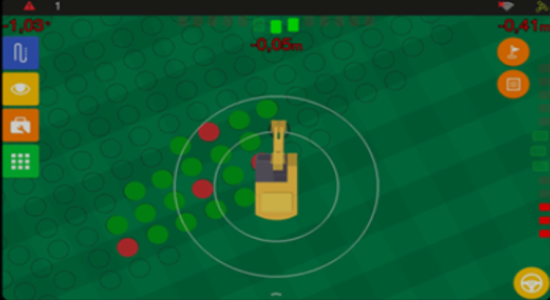
The display connects to the excavator's planting control. When the machine performs a planting action, it sends a signal to the display, which marks that point on the screen, georeferencing the planted seedling position.
It's important to note that the display only indicates the points on the map. It doesn't perform the planting itself, it simply records the moment and position when the machine triggers the planting command.
If you wish to manually mark the point on the screen, click on button highlighted below: